CHANGE BRAKE PADS AND ROTORS YOURSELF ON LATE-MODEL PORSCHES
Why do it yourself?
How to change brake pads and rotors
Why do it yourself?
Two reasons come to mind:
- There's much money to be saved -- You save the labor bill, easily $200, and you can buy the brake pads from a discount source, saving quite a lot more.
- You get a sense of accomplishment that you are maintaining your own car, and it isn't very hard to do.
How to change brake pads?
It's much easier than you think! You need only ordinary hand tools.
- Jack up the car and remove the wheel.
- Examine the retaining pin which goes through the caliper. It will either be a narrow cotter-pin or a large pin, as seen here:
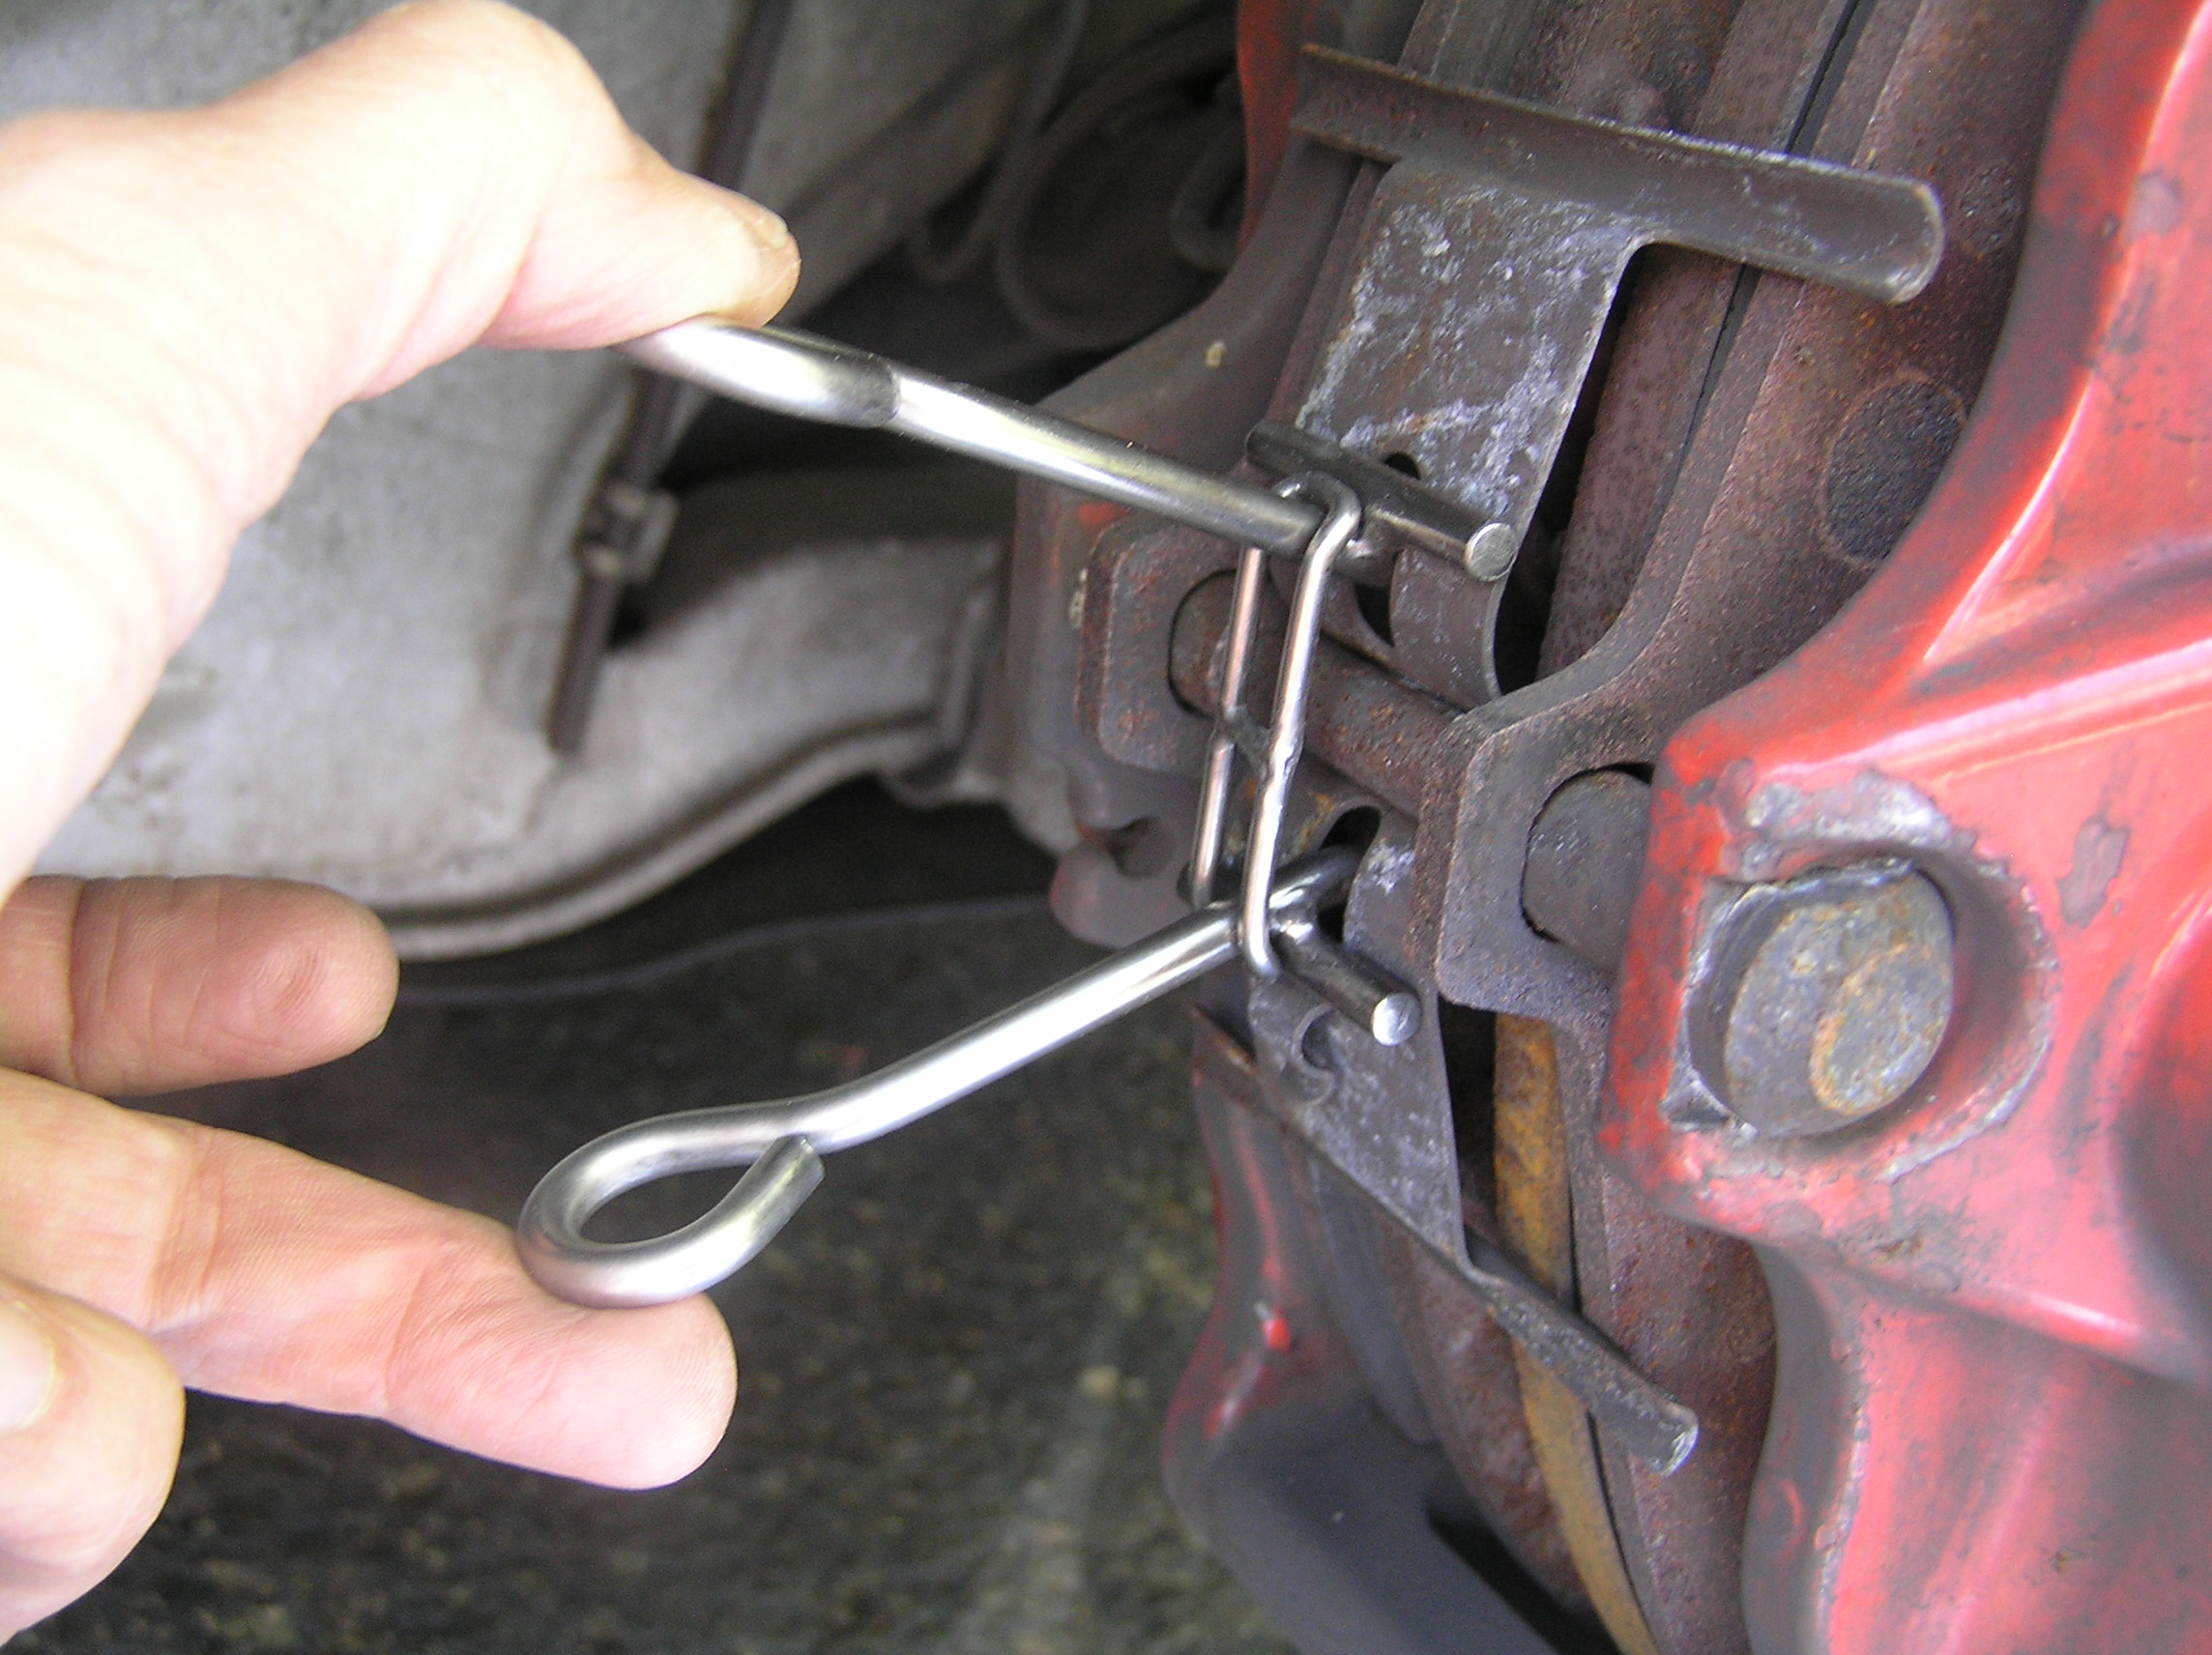
- If it is the large pin, reach to the inside of the caliper and remove the bolt on the far side of the pin with a 13mm wrench. Retain it. If it is a cotter-pin, remove and retain the retaining clip which is slightly inboard of the large spring.
- Compress the spring which holds the retaining pin, either manually or with theTraqJunk Brake Tool.
- Slide out the retaining pin. For the cotter-pin, start with a punch or nail and move the pin with the punch/nail to the inside as much as you can. Then use pliers and a twisting motion to remove the pin. For the large pin, we insert a punch or nail into the threaded area where the bolt which you removed in step 3 (on the inside of the caliper) had been and bang the nailhead/punch with a hammer towards the outside. This should cause the retaining pin to begin to slide out. The spring will fall away.
- With a brake pad spreader tool, available from TraqJunk, or other tool expand ("de-compress") the 2 brake pads so they move away from the rotor. When they are loose enough they will simply fall out or can easily be removed with pliers. You may find that round "spiders" (which are part of the noise suppression system) made of thin metal fall out. These are unimportant and you can safely ignore them if you are unable to put them back into place. On the other hand, one or more round approx 1" diameter beige "rings" may also fall out. These are important and must be retained and replaced when the new pads are installed.
- To insert the new pads, it is necessary to fully compress the pistons into the caliper. This is best done by utilizing the old pads as levers and gently getting the pistons to compress. This is the time to restore any "spiders" and round beige disks which may have fallen out. (The thin metal spiders are unimportant. If any beige disks fell out, they must be restored at this time. By looking inside the caliper you will be able to determine where the rings belong. Press them into place with the large/wide side into the caliper.) Next, slide the new pads into place. If they don't go in easily, compress the pistons again. Note: if you are going to be replacing rotors at this time, it is best to install the new pads after you do the rotor job -- the caliper goes on more easily if there are no pads in it.
- Position the spring, compress it (with the TraqJunk Brake Tool or manually), insert the retaining pin, fasten the retaining pin (with the retained cotter-pin clip or bolt), and the job is complete.
How to change rotors?
You will need a torque wrench and a 10mm allen-key and/or a Torx T55 socket which can fasten to the torque wrench.
- Jack up the vehicle and remove the wheel.
- If you are replacing the brake pads at the same time as the rotor replacement, the rotor job is simpler if you remove the old pads before removing the rotor. (See above procedure.) You will install the new pads after the new rotor is installed.
- If you look at the inside of the caliper (ie towards the inside of the car) you will see 2 round bolt-tops emerge from the caliper. These bolts take a 10mm allen-key to remove. Loosen the bolts with the allen-key but do not fully remove them yet. (When the bolts are removed, the caliper will not be held in place by anything, and it is important that it not hang freely because that would put excess pressure on the brake lines. To avoid that problem, have an upside-down pail ready to place the caliper on, or a length of wire to temporarily tie the caliper to the suspension.) After you have arranged a method to prevent the caliper from falling, remove the 2 bolts and secure the caliper.
- Remove the rotor from the car: (If you are working on a rear caliper, insert a chock behind the rear wheel which is on the ground, and release the parking brake. The parking brake must be released because the rotor cannot be removed if it is engaged.) The rotor is held in place by 2 Phillips head screws. Be prepared for these screws to be difficult to remove. Penetrating oil may help, as may a few good hits with a hammer on the screwdriver. After the 2 screws are removed, the rotor should come off easily. Retain the screws.
- Install the new rotor. Place it on the hub and rotate it so that the holes for the Phillips head screws align with the locations on the hub. Replace the screws but don't tighten them very much. They are only there to keep the rotor in place until the caliper is re-installed.
- Replace the caliper. Slide it in place over the rotor and position it so that the caliper bolts will fit into the threaded holes for them. Tighten the bolts to 65 ft-lbs, using the allen-key and torque wrench.
- Install new pads at this time if you had removed them from the caliper.